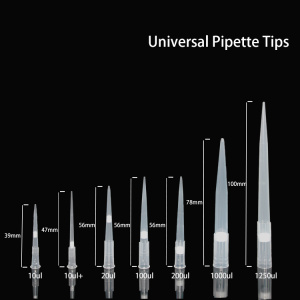
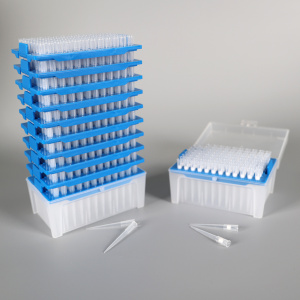
What is the difference between pipette tips with and without filter?
Filtered pipette tips are generally made of natural polypropylene, while inexpensive tips are likely to be recycled polypropylene plastic (in which case the most we can say is polypropylene).
In addition, most tips also add a small amount of additives during the manufacturing process, the common ones are:
1. Color material.
Commonly known as blue tip (1000ul) and yellow tip (200ul) in the market, the corresponding color-developing materials are added to polypropylene (we hope it is high-quality masterbatch, not low-cost industrial pigments)
2. Release agent.
Helps the tip break away from the mold quickly after forming. Of course, the more additives, the higher the chance of undesired chemical reactions during pipetting. So it's best not to add additives! However, due to the relatively high requirements on the production process, there are very few tips on the market that do not add additives at all.
Precautions for the use of filter pipette tips:
1. Before use: Before using a pipette, first look at the pipette marking, accuracy level, and the position of the scale mark.
2. Aspiration: Pinch the upper end of the pipette with the thumb and middle finger of the right hand, and insert the lower mouth of the pipe into the solution to be absorbed. The insertion should not be too shallow or too deep, generally 10-20mm, too shallow will produce Aspirate and suck the solution into the ear bulb to stain the solution, too deep and the solution will adhere to the outside of the tube too much. Take the ear-washing bulb in the left hand, connect it to the upper mouth of the tube and slowly inhale the solution, first inhale about 1/3 of the capacity of the tube, hold the mouth of the tube with the index finger of the right hand, take it out, hold it horizontally, and turn the tube to make the solution come into contact with it. Place above the scale to replace the water on the inner wall, and then release the solution from the lower mouth of the tube and discard it. After repeated washing for 3 times, the solution can be sucked up to above the scale, and immediately press the mouth of the tube with the index finger of the right hand.
3. Adjust the liquid level: lift the pipette up to leave the liquid level, the end of the pipe is still against the inner wall of the solution container, the pipe body is kept upright, and the index finger can be slightly relaxed (sometimes the pipette can be rotated slightly) so that the solution in the pipe slowly drains from the liquid. The lower mouth flows out until the bottom of the meniscus of the solution is tangent to the marking line, and immediately press the mouth of the tube with the index finger. Remove the drop at the tip against the wall, remove the pipette, and insert it into the vessel holding the solution.
4. Release the solution: If the container for the solution is a conical flask, the conical flask should be tilted 30°, the pipette is upright, the lower end of the tube is close to the inner wall of the conical flask, slightly loosen the index finger, and let the solution flow down slowly along the bottle wall , after the end of the flow, the tip of the tube touches the inner wall of the bottle for about 15 seconds, and then the pipette is removed. A small amount of solution remaining at the end of the tube cannot be forced to flow out by external force, because the volume of the solution retained at the end has been taken into account in the comparison.


